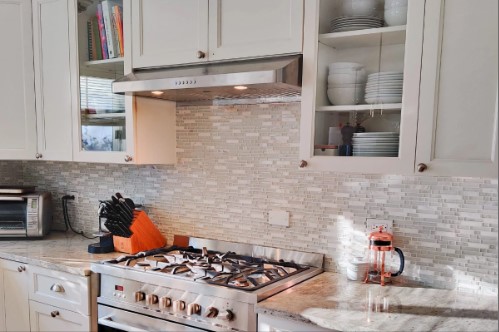
Kitchen ventilation works best when the exhaust system is planned around the hood, ductwork, and available route to the exterior. A properly designed range hood vent can move airborne cooking contaminants outside instead of simply recirculating them within the kitchen. The installation method depends on the hood configuration, wall layout, duct diameter, and location of the exterior exit point. Understanding these factors before beginning an installation can help homeowners plan the project more accurately and avoid unnecessary bends or modifications to the duct system.
What Is a Ducted Range Hood Vent?
A range hood vent uses a physical duct to carry air from the range hood to the exterior of the building. This differs from a ductless or recirculating configuration, which returns filtered air to the room.
Range hoods are available in several configurations, including under-cabinet, wall-mounted, island, insert, and outdoor models. The Proline collection also includes ducted and convertible options, with different sizes and airflow capacities available across its range.
For a wall installation, the duct route needs to connect the hood to an exterior wall or another suitable exit point.
Plan the Venting Route Before Cutting
Planning should take place before making an opening in the wall. The intended exit point determines where the duct will travel and how much space is required behind or above the hood.
Range hood vent guide recommends creating the shortest unobstructed route to the exterior. Its wall-venting instructions also emphasize determining the vent location before cutting because enlarging an opening later is easier than correcting an unnecessarily large cut.
A carefully planned route can reduce unnecessary turns and make the installation easier to complete.
Choose the Correct Duct Size
Duct diameter should correspond to the requirements of the selected hood. Higher-airflow models generally require larger ductwork, so the hood’s specifications should be checked before installation.
The Proline installation guide specifically notes that the required duct diameter increases with the hood’s CFM. A transition piece may also be needed when the blower opening and existing duct diameter do not match.
Using appropriately sized ductwork is therefore an important part of planning rather than something to determine after the wall has already been opened.
Cut the Wall Opening Carefully
Once the vent location and duct dimensions have been established, the wall opening can be prepared. The opening needs to accommodate the duct without leaving excessive unused space.
Proline’s step-by-step guide recommends making the opening approximately 1–2 inches larger than the ductwork. This provides room for positioning the duct while avoiding an unnecessarily oversized opening.
Before cutting, it is important to account for the wall’s construction and identify framing or other components that may affect the proposed route.
Install the Ductwork
After the wall opening is prepared, the ductwork can be routed between the hood and exterior wall. The goal is to create a direct path with as few unnecessary turns as possible.
The duct should be installed according to the hood manufacturer’s requirements and connected securely to the hood’s blower or transition piece. Proline’s installation instructions recommend having the ductwork prepared before connecting the hood, while aluminum or HVAC tape can be used at appropriate connections.
The specific materials and connection methods should always follow the hood’s installation instructions.
Connect the Hood to the Duct
Once the duct route is ready, the range hood can be mounted and connected to the prepared ductwork. Proper mounting is important because the hood must remain securely supported while the duct connection is maintained.
Proline recommends securing range hoods to studs or suitable supports. Its installation instructions also describe attaching previously installed ductwork to the hood’s blower before completing the power connection.
The electrical connection should follow the manufacturer’s instructions and applicable local requirements. Proline advises consulting an electrician before directly wiring a hood to a power source.
Install an Exterior Wall Cap
A wall cap completes a horizontal vent installation by providing the exterior termination point for the duct. It helps protect the duct opening from outdoor exposure.
Proline’s wall-venting guidance specifies a side wall cap for horizontal venting and recommends sealing the cap with caulking.
The exterior termination should be positioned and sealed carefully so that the duct has a suitable exit path and the wall opening is properly protected.
Keep the Duct Path as Direct as Possible
Duct layout has a significant effect on the overall venting system. Every unnecessary bend can make the route more complicated, so the installation should be planned around the most direct practical path.
For wall-mounted hoods, Proline recommends venting through the wall on which the hood is mounted when possible because this can minimize the amount of ductwork required. Alternative routes may be necessary depending on the home’s structure and the hood’s configuration.
A shorter, more direct route can also simplify installation and reduce the amount of material required.
Consider the Hood Type and Location
The hood configuration influences how the duct should be routed. Wall-mounted and under-cabinet hoods can commonly use horizontal wall venting, while island hoods are often positioned for vertical venting through the ceiling and roof.
Proline’s range hood collection includes under-cabinet, wall-mounted, island, and insert models, as well as different sizes and airflow capacities.
Selecting the hood and determining the vent route together can help prevent installation conflicts later in the project.
When Professional Installation Makes Sense
Installing a ducted hood can involve cutting through walls, routing HVAC ductwork, securing equipment, and making electrical connections. Structural conditions can also make some installations more complicated than expected.
Proline notes that ductwork is the most difficult part of a wall-venting installation and recommends hiring a local contractor if the homeowner is not comfortable completing the work.
Professional assistance can be particularly useful when the proposed route involves complicated framing, difficult access, or electrical modifications.
Conclusion
A successful wall-vented hood installation starts with careful planning. Selecting the appropriate duct size, establishing a short and unobstructed route, preparing the wall opening, securing the hood, connecting the ductwork, and installing a properly sealed exterior wall cap are all important stages. For anyone researching how to install a range hood vent through the wall, following the manufacturer’s installation requirements and obtaining professional assistance for complex structural or electrical work can help create a more reliable ventilation setup.







Most Commented Posts